Agenda
This guide covers the mandatory tools required for the bootcamp:
- VSCode
- Live Server (VSCode Extension)
- GitHub Account
1. VSCode
Step 1 — Download & Install
- Go to https://code.visualstudio.com/
- Download the version for your OS (Windows, macOS, Linux).
- Install with default settings.
Step 2 — Open Project Folder
- Launch VSCode.
File > Open Folder→ choose your project folder.
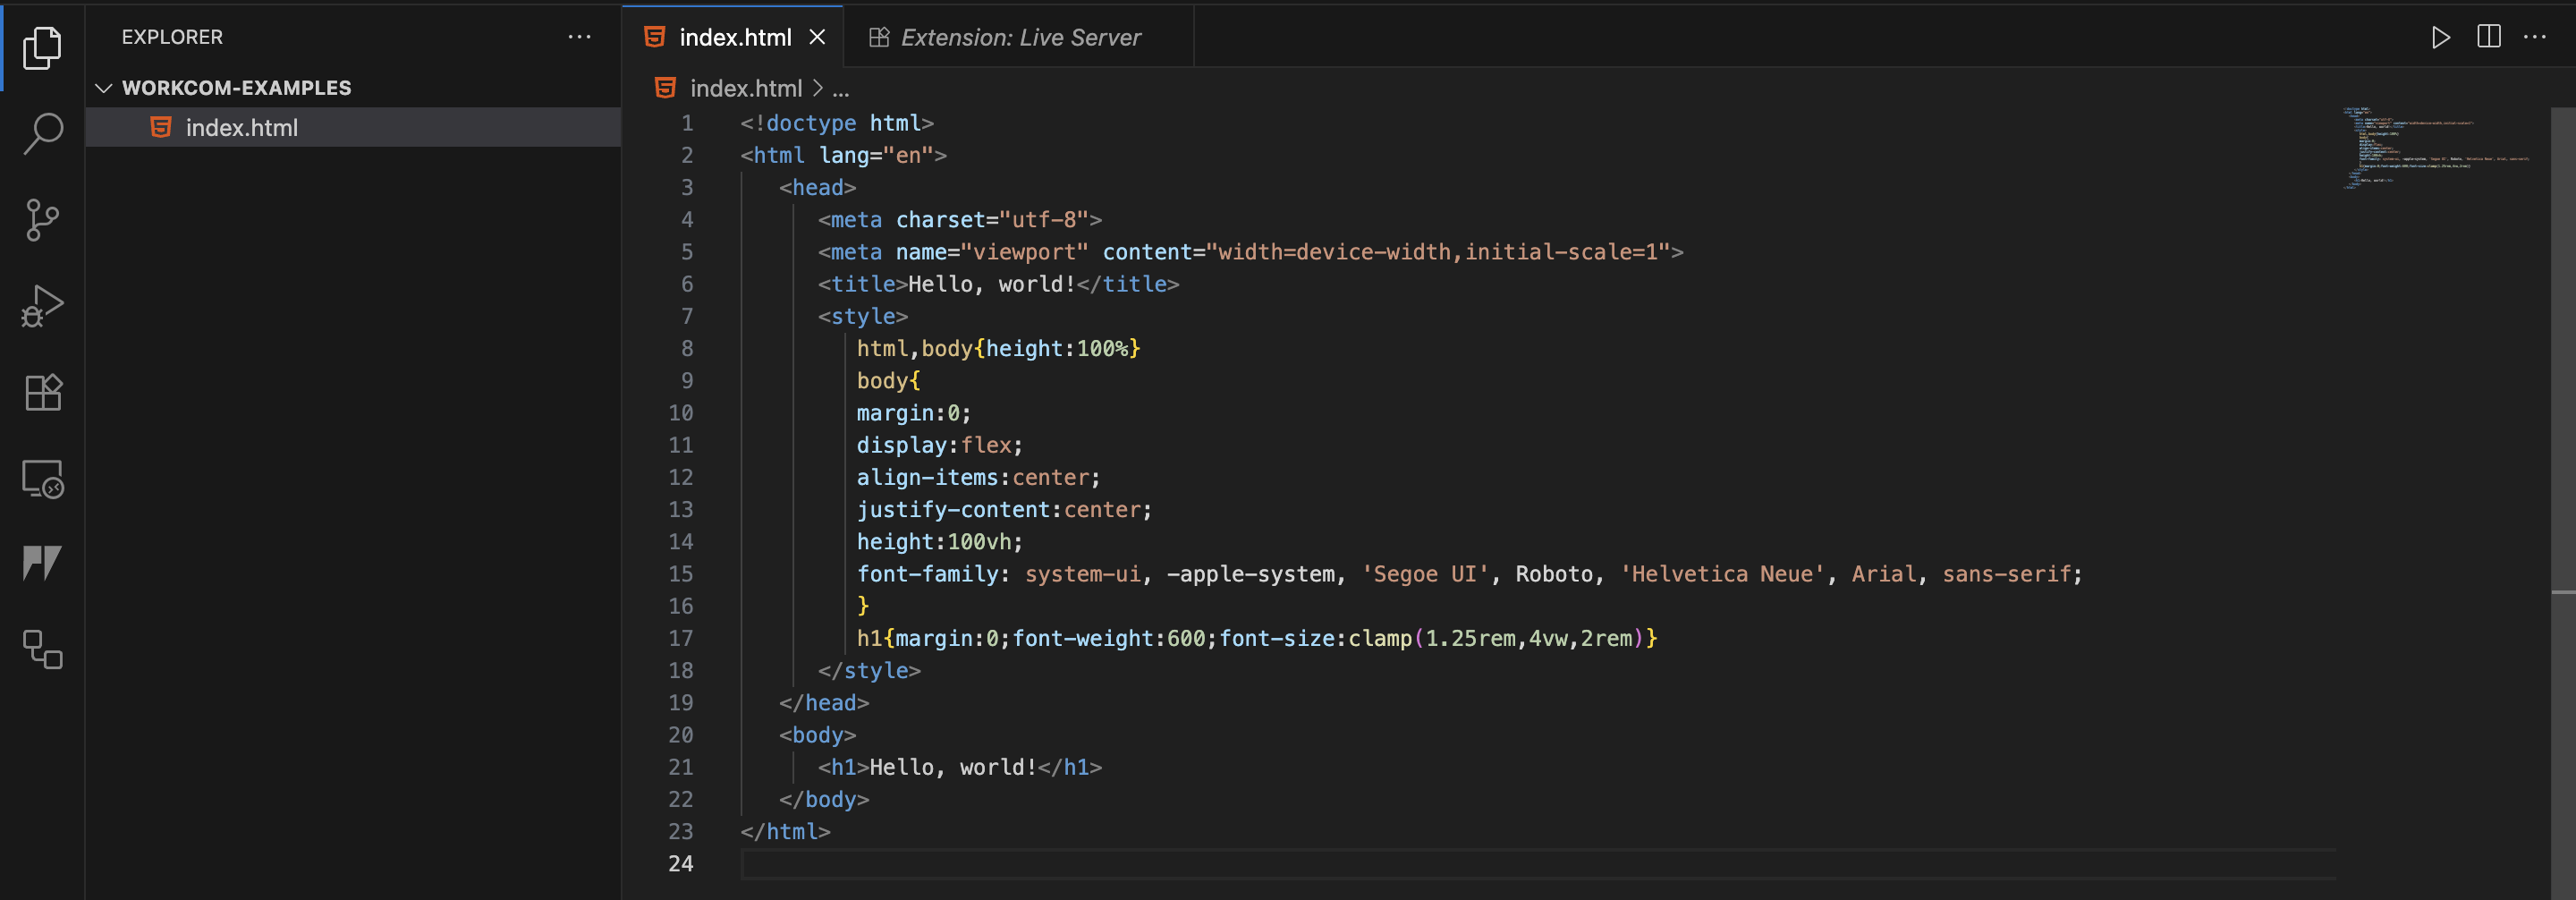
Step 3 — Create Files
- Example:
index.htmlwith the following contents:
<!doctype html>
<html lang="en">
   <head>
      <meta charset="utf-8">
      <meta name="viewport" content="width=device-width,initial-scale=1">
      <title>Hello, world!</title>
      <style>
         html,body{height:100%}
         body{
         margin:0;
         display:flex;
         align-items:center;
         justify-content:center;
         height:100vh;
         font-family: system-ui, -apple-system, 'Segoe UI', Roboto, 'Helvetica Neue', Arial, sans-serif;
         }
         h1{margin:0;font-weight:600;font-size:clamp(1.25rem,4vw,2rem)}
      </style>
   </head>
   <body>
      <h1>Hello, world!</h1>
   </body>
</html>- Use Explorer sidebar to manage files.
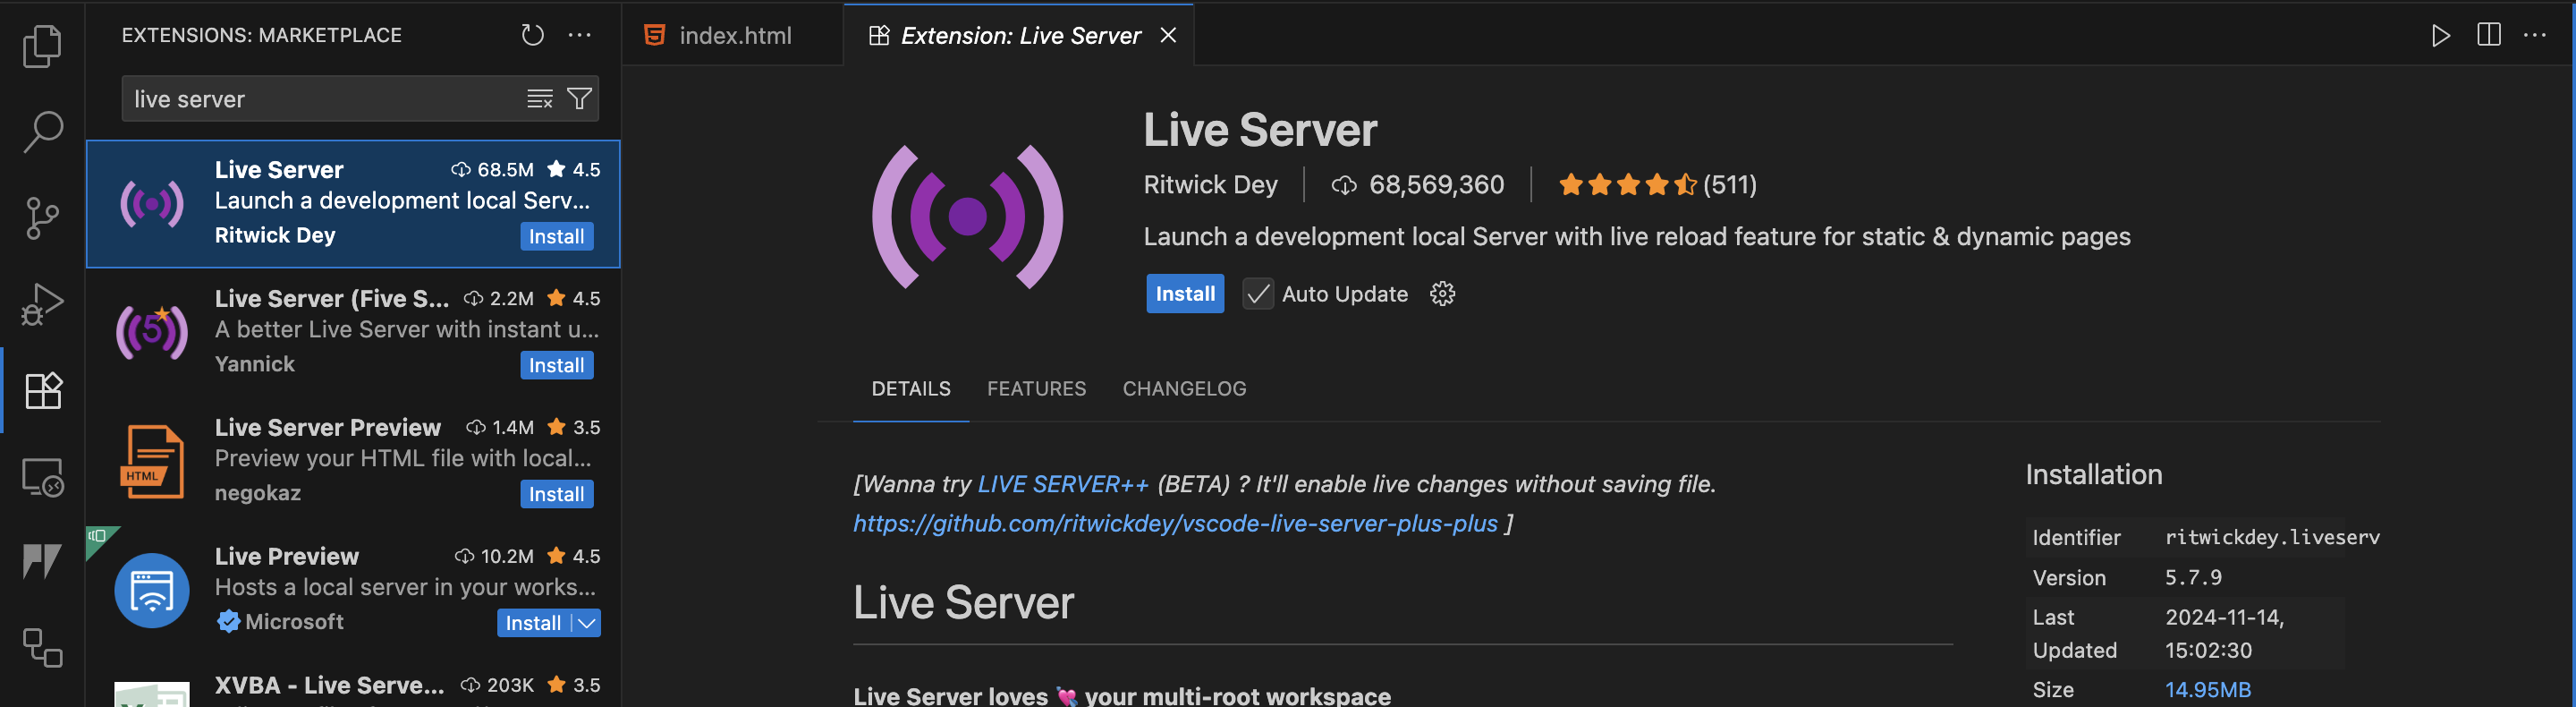
2. Live Server (VSCode Extension)
Step 1 — Install Extension
- Open Extensions tab in VSCode (
Ctrl+Shift+X/Cmd+Shift+X). - Search Live Server (by Ritwick Dey).
- Click Install.
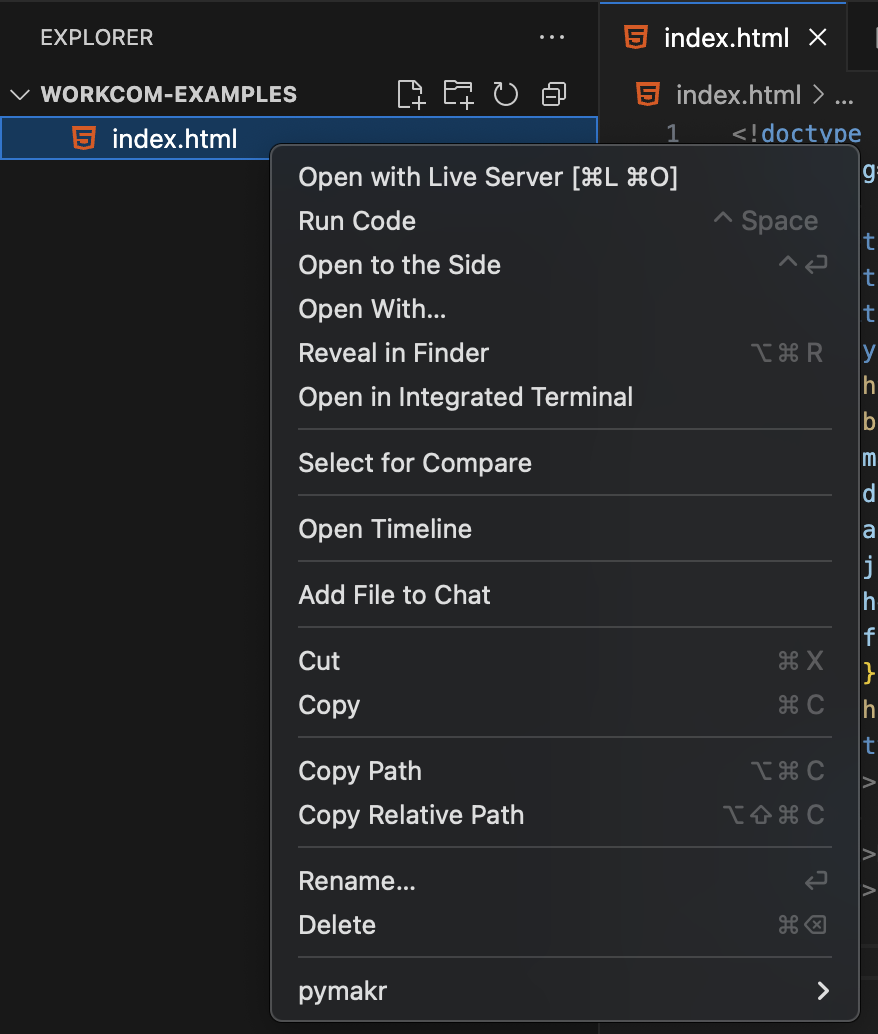
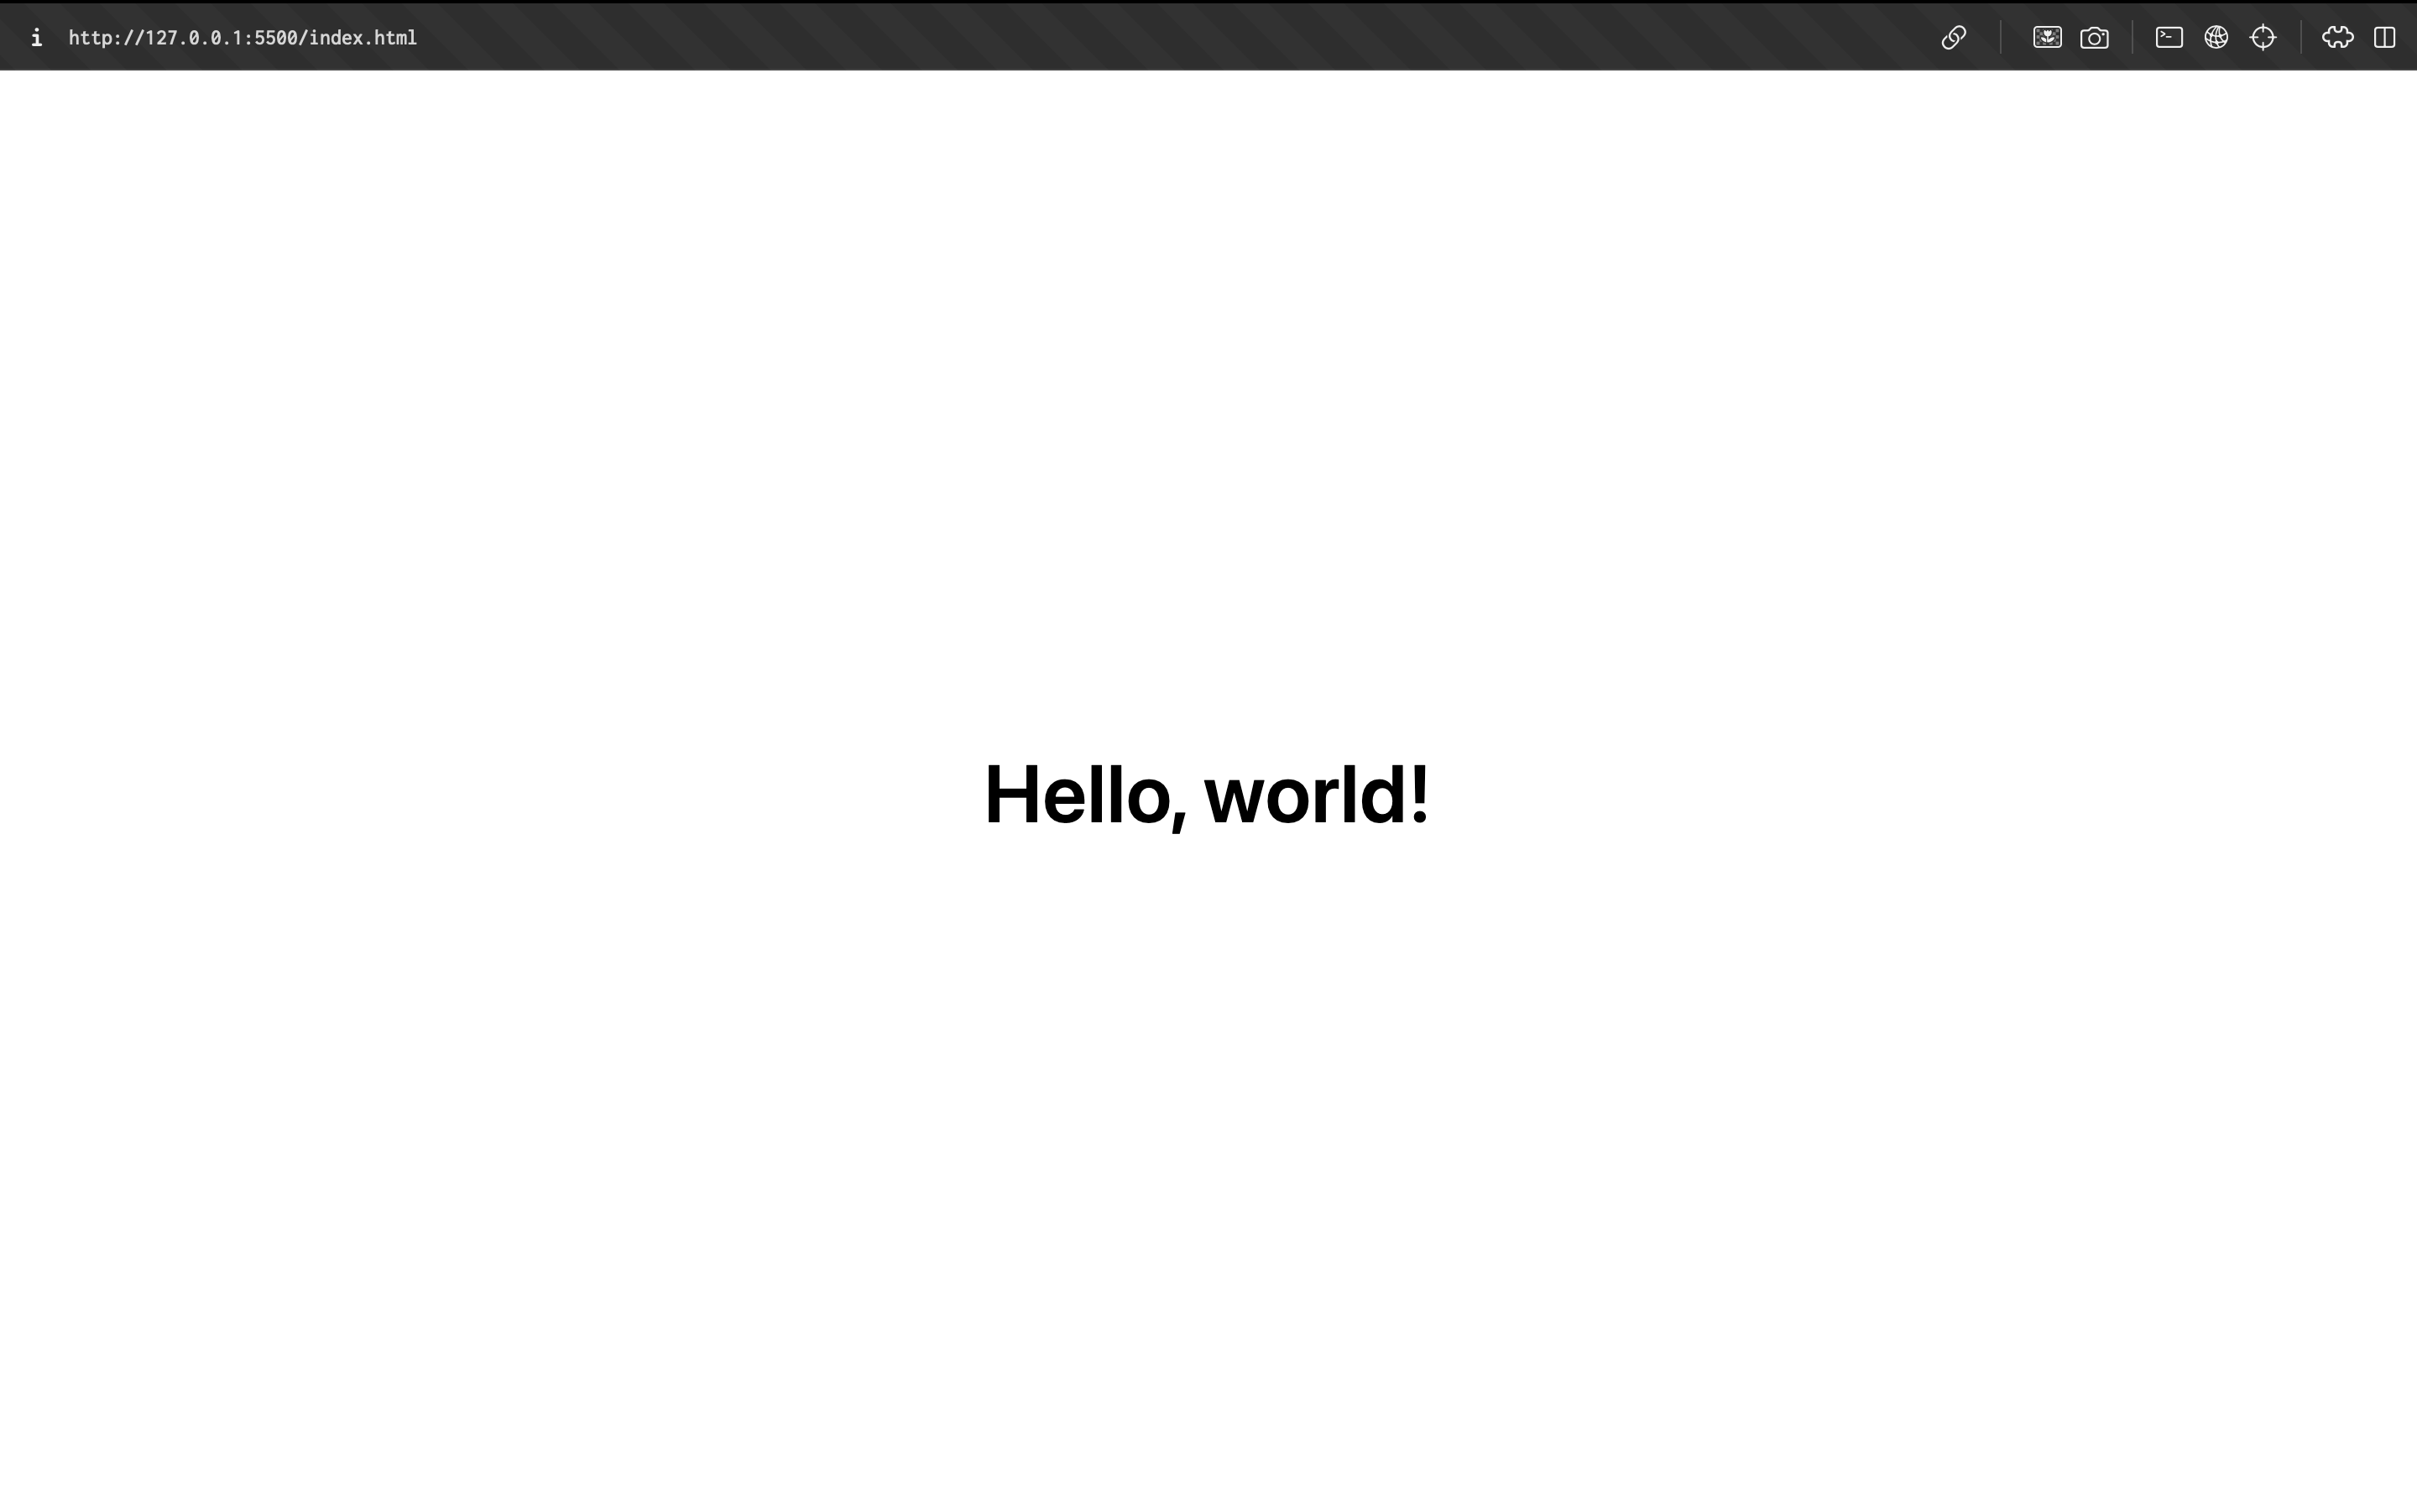
Step 2 — Run Website
- Right-click
index.html→ Open with Live Server. - A local server starts (usually at
http://127.0.0.1:5500). - Browser reloads automatically on file save.
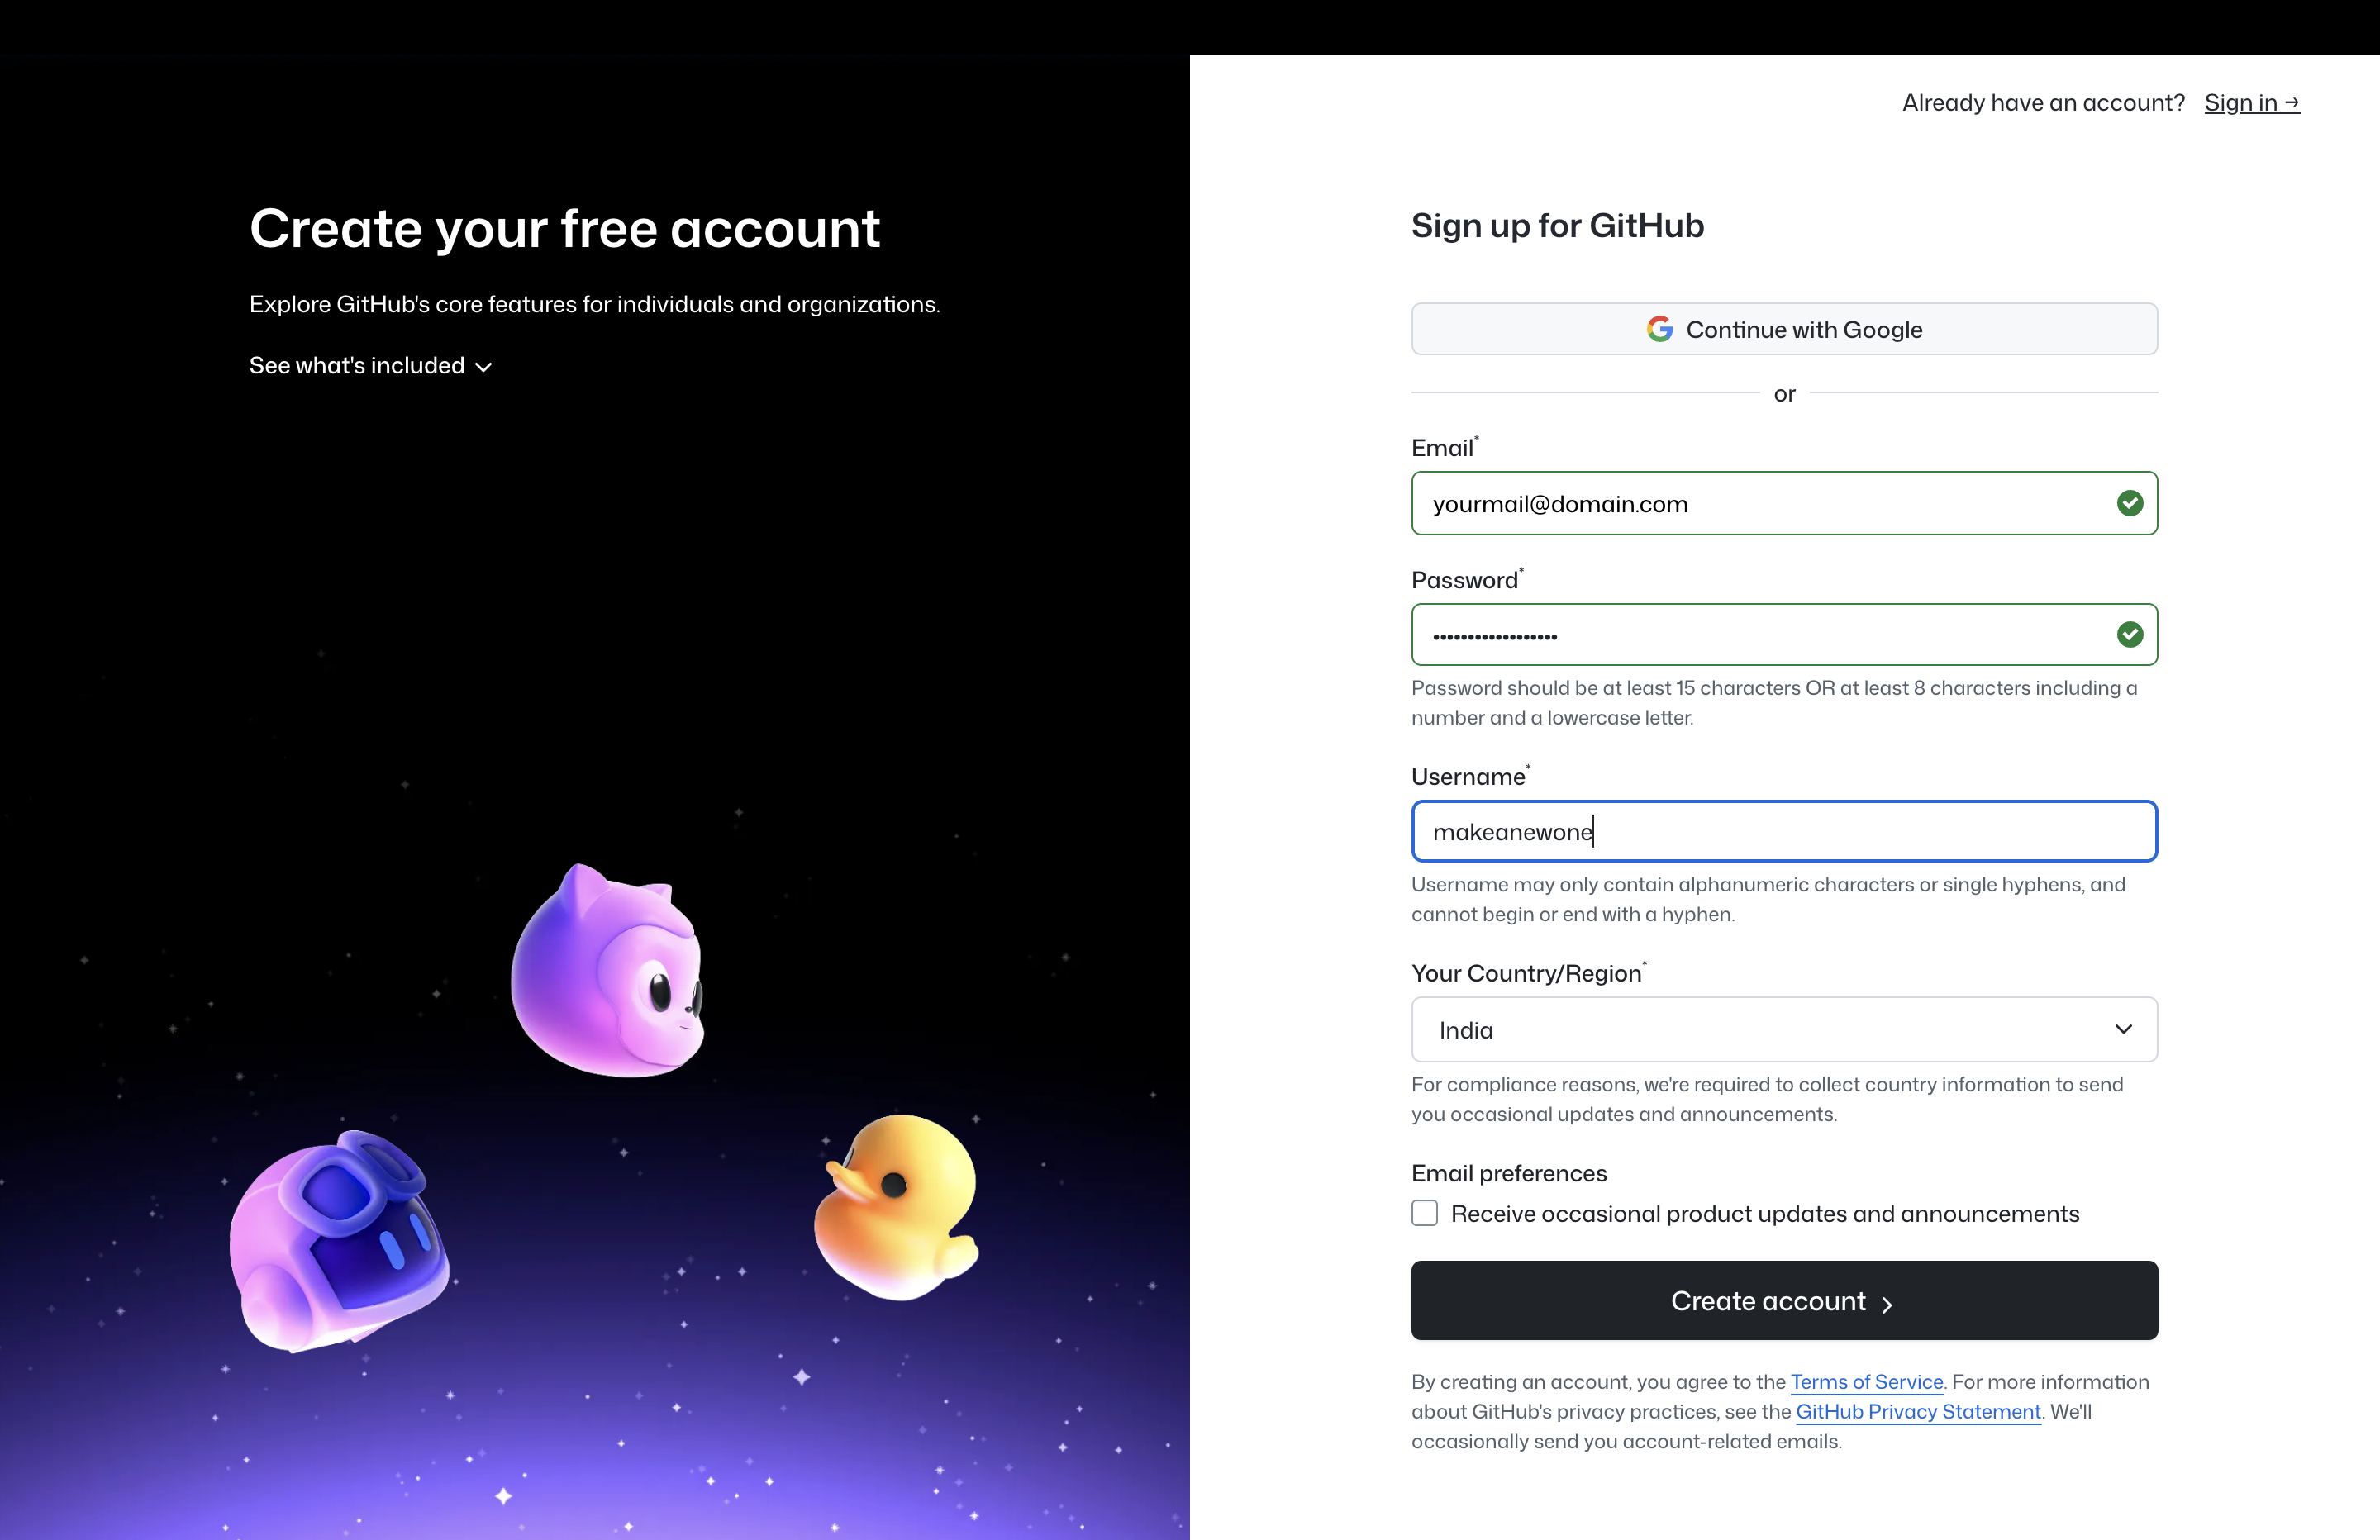
3. GitHub Account
Step 1 — Sign Up
- Go to https://github.com/
- Click Sign up.
- Enter email, username, and password.
- Verify email.
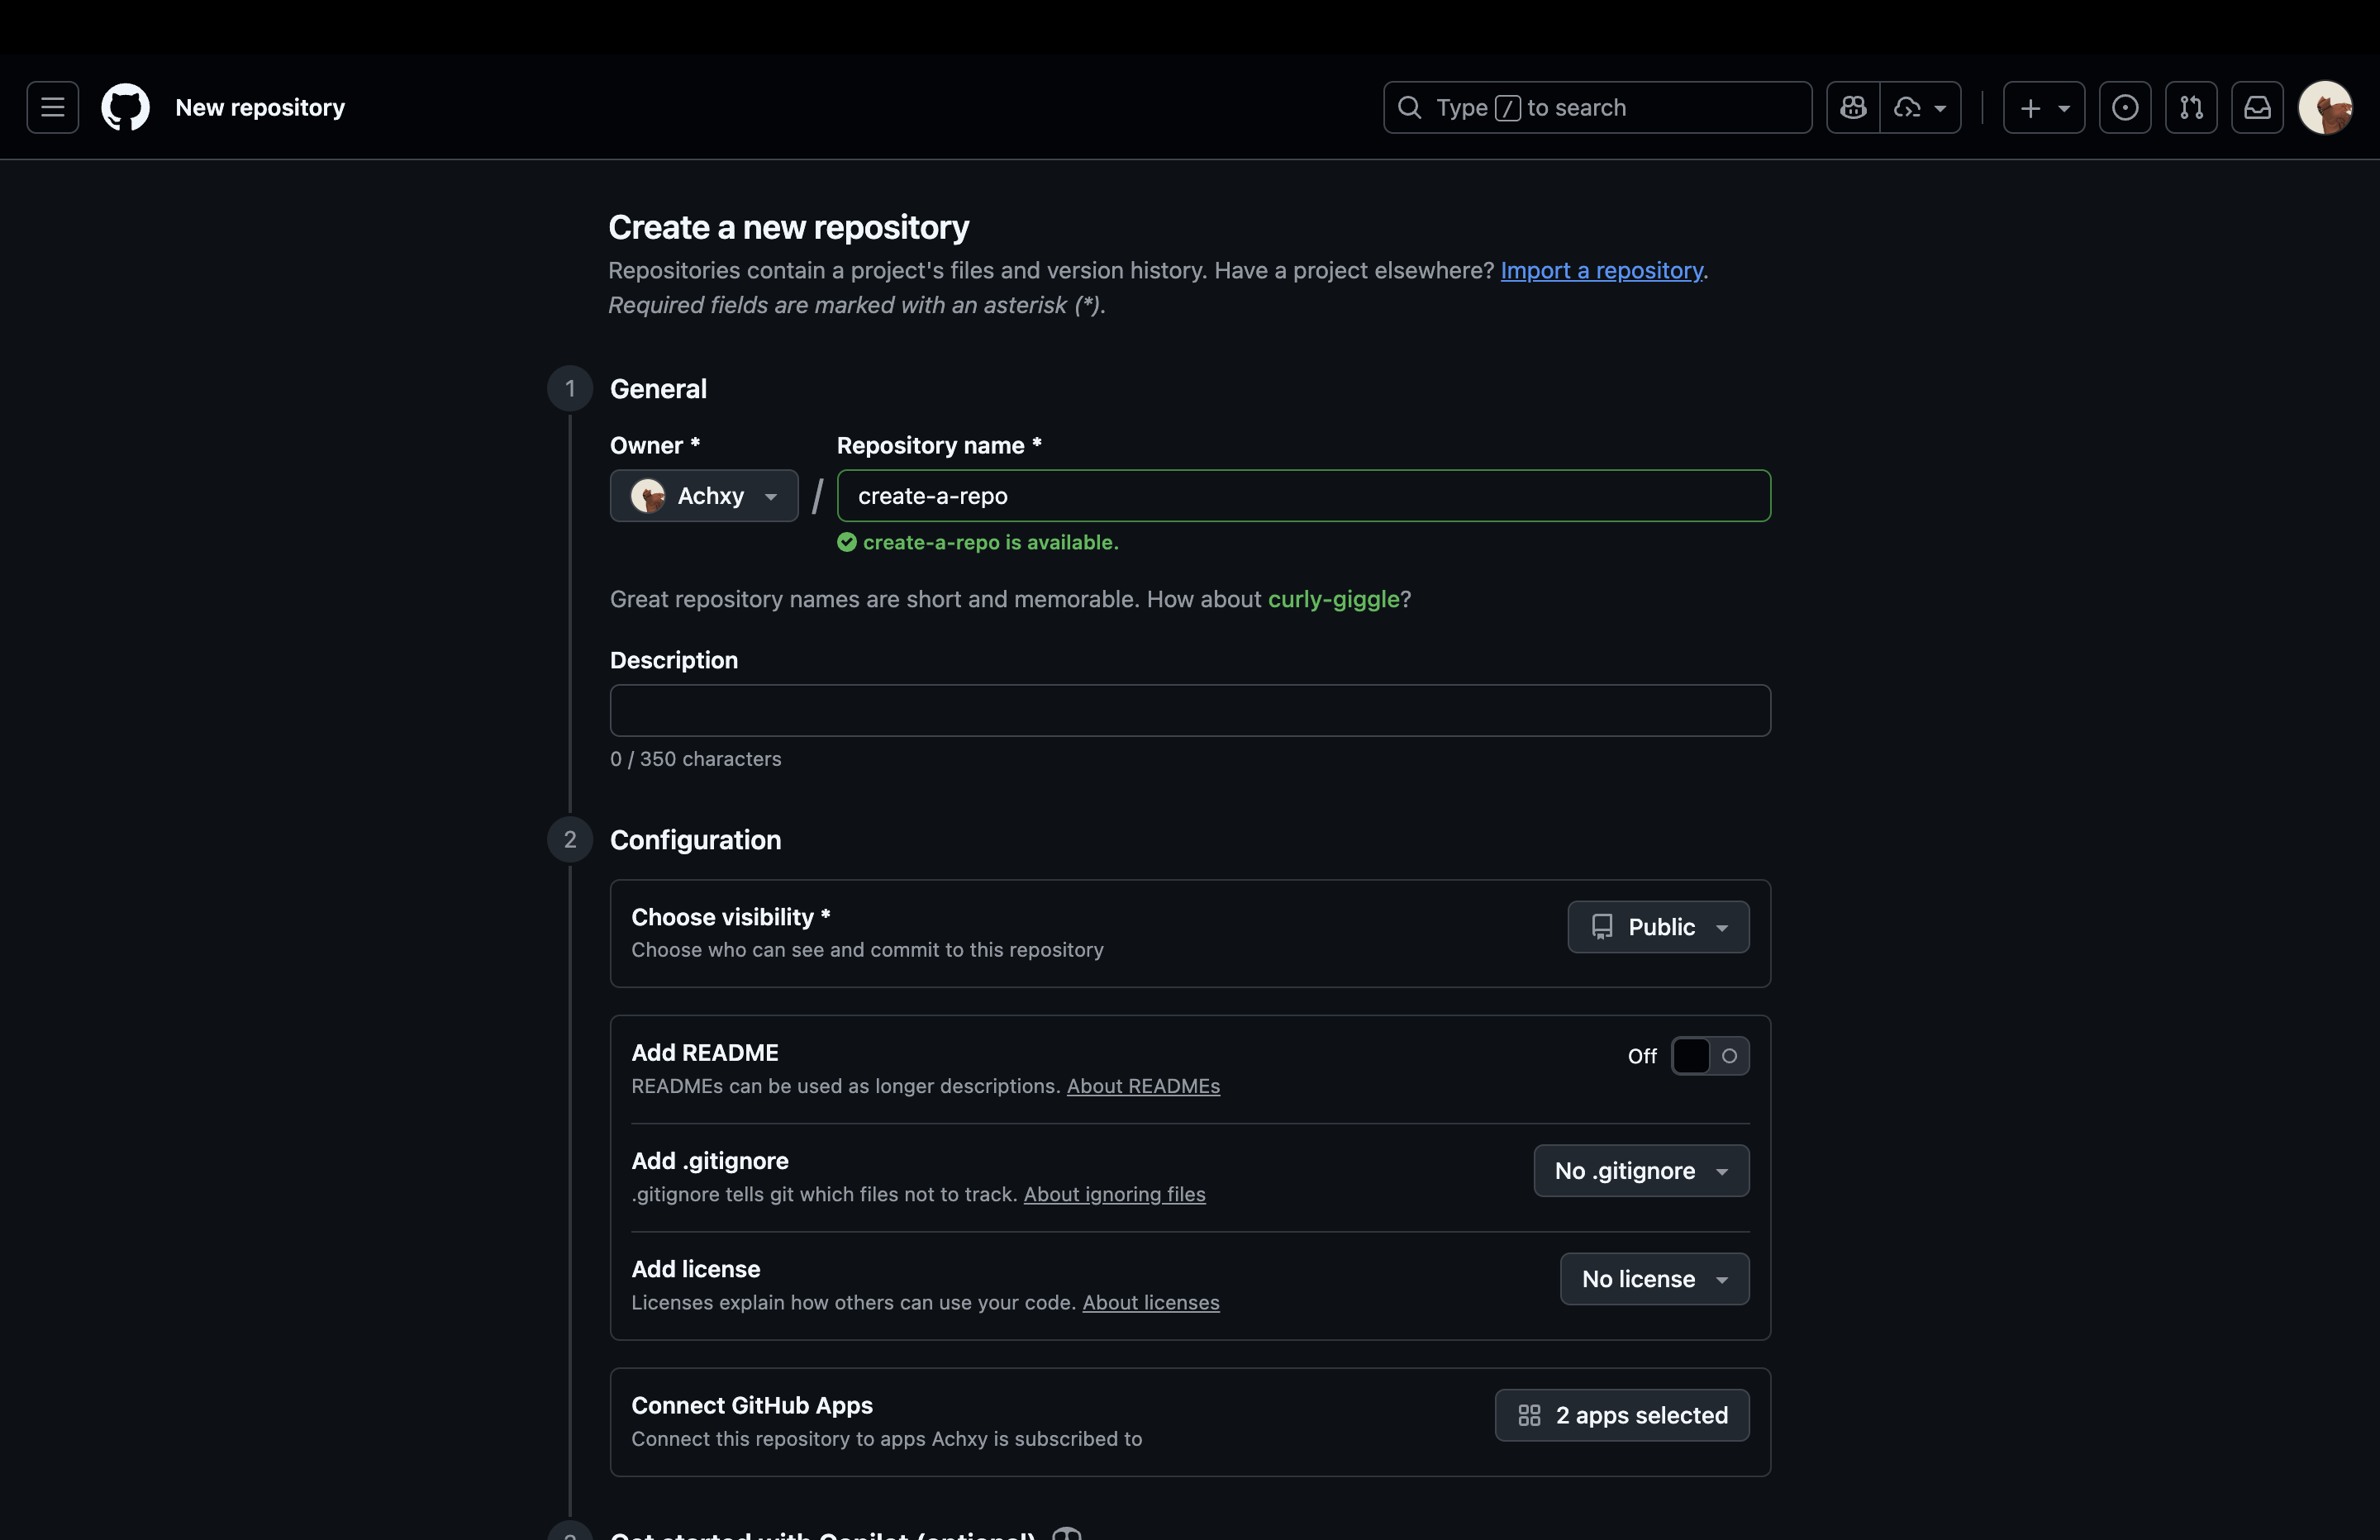
Step 2 — Create Repository
- After login → Click New Repository.
- Name: e.g.,
webdev-bootcamp. - Choose Public (default).
- Add a README (optional).
- Click Create repository.
Step 3 — Connect Locally
- Install Git (if you do not already have it, check by running
git --version) - Follow the guide provided in the completion page to connect to the remote repository (feel free to ask mentors for help :D)